How to Remove Scratches and Scuff Marks from a Car?
This guide will explain how to permanently remove small scratches and scuff marks from your car’s paint. Your car will start shining again like new. There is one thing you need to know before going further: there are several types of paint damages. In this guide, I will explain how to get rid of the most common type, the clear coat scratch. This type isn’t deep but it’s very common.
Paint Layers
There are 4 layers of paint and the way you remove the scratches depends on which layer is damaged.
- Primer is the first. It goes over the metal of the car to keep it from water and rust. It’s usually grey.
- The base coat goes second. This coat gives your car a color.
- Clear coat is the third. It protects the color from deep damage. This last coat is the thickest one and it’s transparent. It also gives the color its glossy shine.
There are many ways you get clear coat scratches. Someone can just walk too close to your car and damage the surface with a zipper. You may damage the surface yourself when you clear it with a towel with some sand or grit. Pets may also damage it with their claws. The surface of new cars is so shiny that any small damage can be seen clearly.
The reason you can see it is that the final layer is thick and transparent. When light hits the damage it stands out. On new paint, when the light hits the surface it reflects back in a constant pattern. But when there is a damage the light reflects back differently and it catches your eye. What you need to do is to smooth out that scratch so light doesn't catch it anymore.
Getting Prepared
As I have already mentioned above, this guide is about getting rid of clear coat scratches only. But how do you know if your scratch is a clear coat scratch?
Well, it is actually pretty simple to find out. One of the easiest ways is to just get some soapy water and spray it down. If the damage line disappears then it’s a clear coat scratch. This happens because the scratch fills with water and the reflection matches the rest of the paint. Once the water dries it will appear again.
If you spray and the line doesn’t disappear that means that the deeper layers are damaged and you need more serious things to fix this. Plus if you look closely, you can actually see the grey primer coat.
If your scratch isn’t too deep you can remove it using this guide. You will need following products for this:
- Soapy Water. You can make it at home. Mix 1 tablespoon of soap powder and 4 liters of water.
- 3M 03064 Trizact 3-2/3" x 9" 3000 Grit Performance Sandpaper. You may take another 300 grit sandpaper but this is perfect for the goal.
- Trizact 3M (3056) 3-2/3" x 9" 5000 Grit Performance Sandpaper. Also another perfect tool. You also can buy 5000 grit sandpaper of other manufacturer but I recommend this.
- Meguiar's G10307 ScratchX 2.0 polish
- Meguiar's G18211 Ultimate Paste Wax - 11 oz.
- Chemical Guys MIC_507_06 Professional Grade Premium Microfiber Towel, Gold (16 in. x 24 in.) (Pack of 6)
- Scotch Masking Tape for Hard-to-Stick Surfaces 2060-24A, 1-Inch by 60-Yards
As you see the products aren’t expensive at all. This is why I like this method. You don’t need to spend a lot but the result is amazing.
The Removing Process
Now I am going to tell you about five simple steps on how to remove a scratch.
Step 1. Take soapy water and a clean microfiber towel. I recommend buying a new towel for this because if you take an old towel it may contain some sand or other stuff. If your microfiber towel still has a tag on it, make sure your rip that tag off. This tag can actually scratch the paint a little and we are trying to remove scratches not create them.
Take your soapy water and clean an area around the scratch. Remove dirt with towel. You can do it several times to make the area entirely clean. If there is too much dirt don’t use this new towel. Remove the dirt first. This new towel is for final cleansing.
Step 2. Take your tape and place it about a half of an inch above and below the scratch. Rip off the ends of the tape so that the end of the scratch is at the end of the tape on both sides. This tape will show you an area where the damage is because when you start fixing process it will be difficult to find that area without any mark. So the tape is our mark. It should be like this:
One thing to note is that we are going to move the tape up and down to create a bigger area for each step. So we are going to work the first step in the smaller area and the next step we are going to get it bigger and bigger.
We are feathering in all our work so the paint blends nice and smooth. It’s not like there is a strongly visible tape line. It will be blended in nicely.
Step 3. Now you need to sand the scratch down. If the scratch is deep and it catches your fingernail then you should start with the 3000 GRIT. But if the scratch isn't that deep and it really doesn't grab your fingernail that much you can skip right to the 5000 GRIT.
You need to sand perpendicular to the scratch (against the grain).
There is one secret: grab a kitchen sponge and wrap the sponge with your sandpaper. This will prevent uneven pressure when pushing down with your sandpaper. If you are just using your fingers you are going to have a pressure point where each of your fingers is. When you use a sponge that pressure is distributed across the whole sponge so the pressure on the sandpaper will be a lot more even and your sanding job will come out a lot better.
Now you just need to spray down the area. Don't be afraid to get it soaking wet. Also spray down your sand paper. And now we are going to start sanding along this whole line perpendicular to this whole scratch.
Control the pressure! With this 3000 grit you want to push down with medium pressure. Every manufacturer uses a different clear coat. Some clear coats are harder than others. In general, I like to sand the scratch for about 15 seconds and then check to see if it is still there by wiping down the area with the towel.
You need to sand the area until the scratch line is almost gone. Get your surface wet again and keep sanding until you can’t see the damage.
Repeat all this: wipe the area and check to see if your scratch is still there. If it is gone you are done with the 3000 grit. If it is still there continue working until it is gone. This may take a few tries but be patient! You don't want to burn through that clear coat.
After the line is gone but there is a haze in the working area. That’s OK, don’t be afraid. You need to move the tape up and down about another inch or two to make the working area larger.
Get 5000 grit sandpaper and work in this larger area. But also go up and down a little bit to make it clear.
Make sure you use the sponge again and spray lots of soapy water. Don’t forget to spray the sandpaper too. Now we are following the same exact process as with our 3000 grit except now with the 5000 grit we are going in circular motion to cut down the scratches in all directions.
Plus we are moving up outside the area that we just worked in to blend in the scratches into the surrounding paint.
After you do the circular sanding for some time spray down the area and clean it off to inspect our work.
You will see that the scratch is completely gone. There is no mark at all where it used to be. Prefect!
If your line is still there keep going with the 5000 grit until you don't see it anymore. If you see any of the scratch you're going to be able to see it when you're done. So make sure you remove it completely!
Step 4. In this step you need to use a really fine polish. If the polish says it will remove fine scratches and swirl-marks that means you can use it. Polish has grit in it so think of this between 5,000 and 10,000 grit.
Before you polish, clean the surface to remove all of the dirt. Make sure it is clean because you don't want to rub any of the dirt into the paint.
Get a clean part of your microfiber towel that you have not used yet and put the polish right on the towel. Now just rub this polish in, in a circular motions. Focus our polishing this hazy area but also feather into the surrounding paint.
You want a medium to heavy pressure on that microfiber towel because this is a really fine polish. More pressure than when you were using your sandpaper.
When polishing, you want to attack the scratches at all angles. Polish in a circular motion and work that polish in there good.
Continue this until you don’t see any haze at all! There must be a good reflection and the working area must be like surrounding paint.
Step 5. Take your paste wax. I suggest using a paste wax because it works better than a liquid wax in this situation. This is a protective layer. Not only does the wax fill in any microscopic scratches, it also protects your clear coat. This is a super important step. And this is very simple.
Apply the wax, give it a minute to haze up and wax off.
Now you shouldn’t see the scratch at all. The only thing you can see is the gorgeous reflection of the surface.
The best part about this is that it’s so simple and you can do it at home! You don’t need any special tools: only soapy water, sandpaper, polish and wax.
You need to login to add new comments.
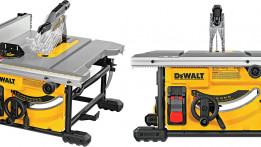
This DeWalt DWE7485 review will tell you the most important things about this 8-1/4 inch Compact Jobsite Table Saw. You will find out about its features and if it’s worth the money.
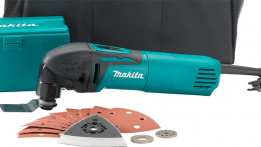
What to do if your Makita TM3010C stopped working? You have several options: first of all start with a warranty. Find out if your tool is under warranty and if yes, send it for repair.…
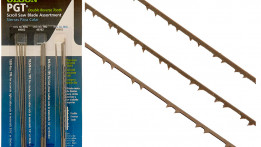
Olson Saw PG49802 Precision Ground Scroll Saw Blades can be used with different models of saws including DeWalt DW788, Delta 40-560 and others. They can cut different types of wood:…
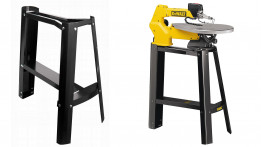
In this article, I want to review DeWalt DW7880 Scroll-Saw Stand. I will tell you about my whole experience of using this item. You will find out what are the sizes and if it stands…
In today’s article, I want to review the DeWalt DW788 20 IN. Variable-Speed Scroll Saw. This tool has over 500 votes on Amazon with 70% 5-star ratings. It’s one of the best scroll saws…

Comments ()